

One of the crucial steps while you create your chatbot is creating the chatbot flow. Your purpose of creating a chatbot cannot be fulfilled without having a relevant and good chatbot flow. Sometimes creating a chatbot flow can be very overwhelming, as there are end number of things that can be done and have to be done while interacting with your audience. But worry not, we will cover everything with an example so that you leave with a clarity after reading this blog.
Your chatbot has to feel like a natural to connect with your audience and chatbot flows plays a very important role in making that happen. To do that, you have created a chatbot flow taking into account every possible scenario that might possibly occur to make the entire journey for the user and for your team seamless.
In this article, we’re walking you through the art of building chatbot flows that feel right. Let’s get started!
What is a Chat bot flow?
A chatbot is a software that works as a replacement for your human agent. In order to make the conversation feel natural or for that matter, even to make the conversation happen, you need to program your bot to behave in a certain manner in a certain scenario. This is done via chatbot flow. A Chatbot flow basically outlines the steps and paths the conversation can take based on what the user says or selects.
Here's a simple breakdown:
- Starting point: The conversation begins with a greeting or a question from the chatbot.
- User input: The user responds, either by typing or selecting an option.
- Bot response: The chatbot gives an answer or asks another question based on the user's input.
- Decision points: Depending on the user's response, the conversation can go in different directions (like a choose-your-own-adventure story).
- Ending: The conversation ends when the user's needs are met, or the chatbot has provided all the necessary information.
A chatbot flow is a structure that determines how a chatbot conversation will take place, taking into account the questions your chatbot would ask and the various replies that a user could provide. A chatbot flow is a series of paths that a user’s responses could trigger.
Each path would consist of nodes that either display, request, or process information. Some of these nodes could even be used to integrate your chatbot with third-party software.
Key factors of a Chat flow
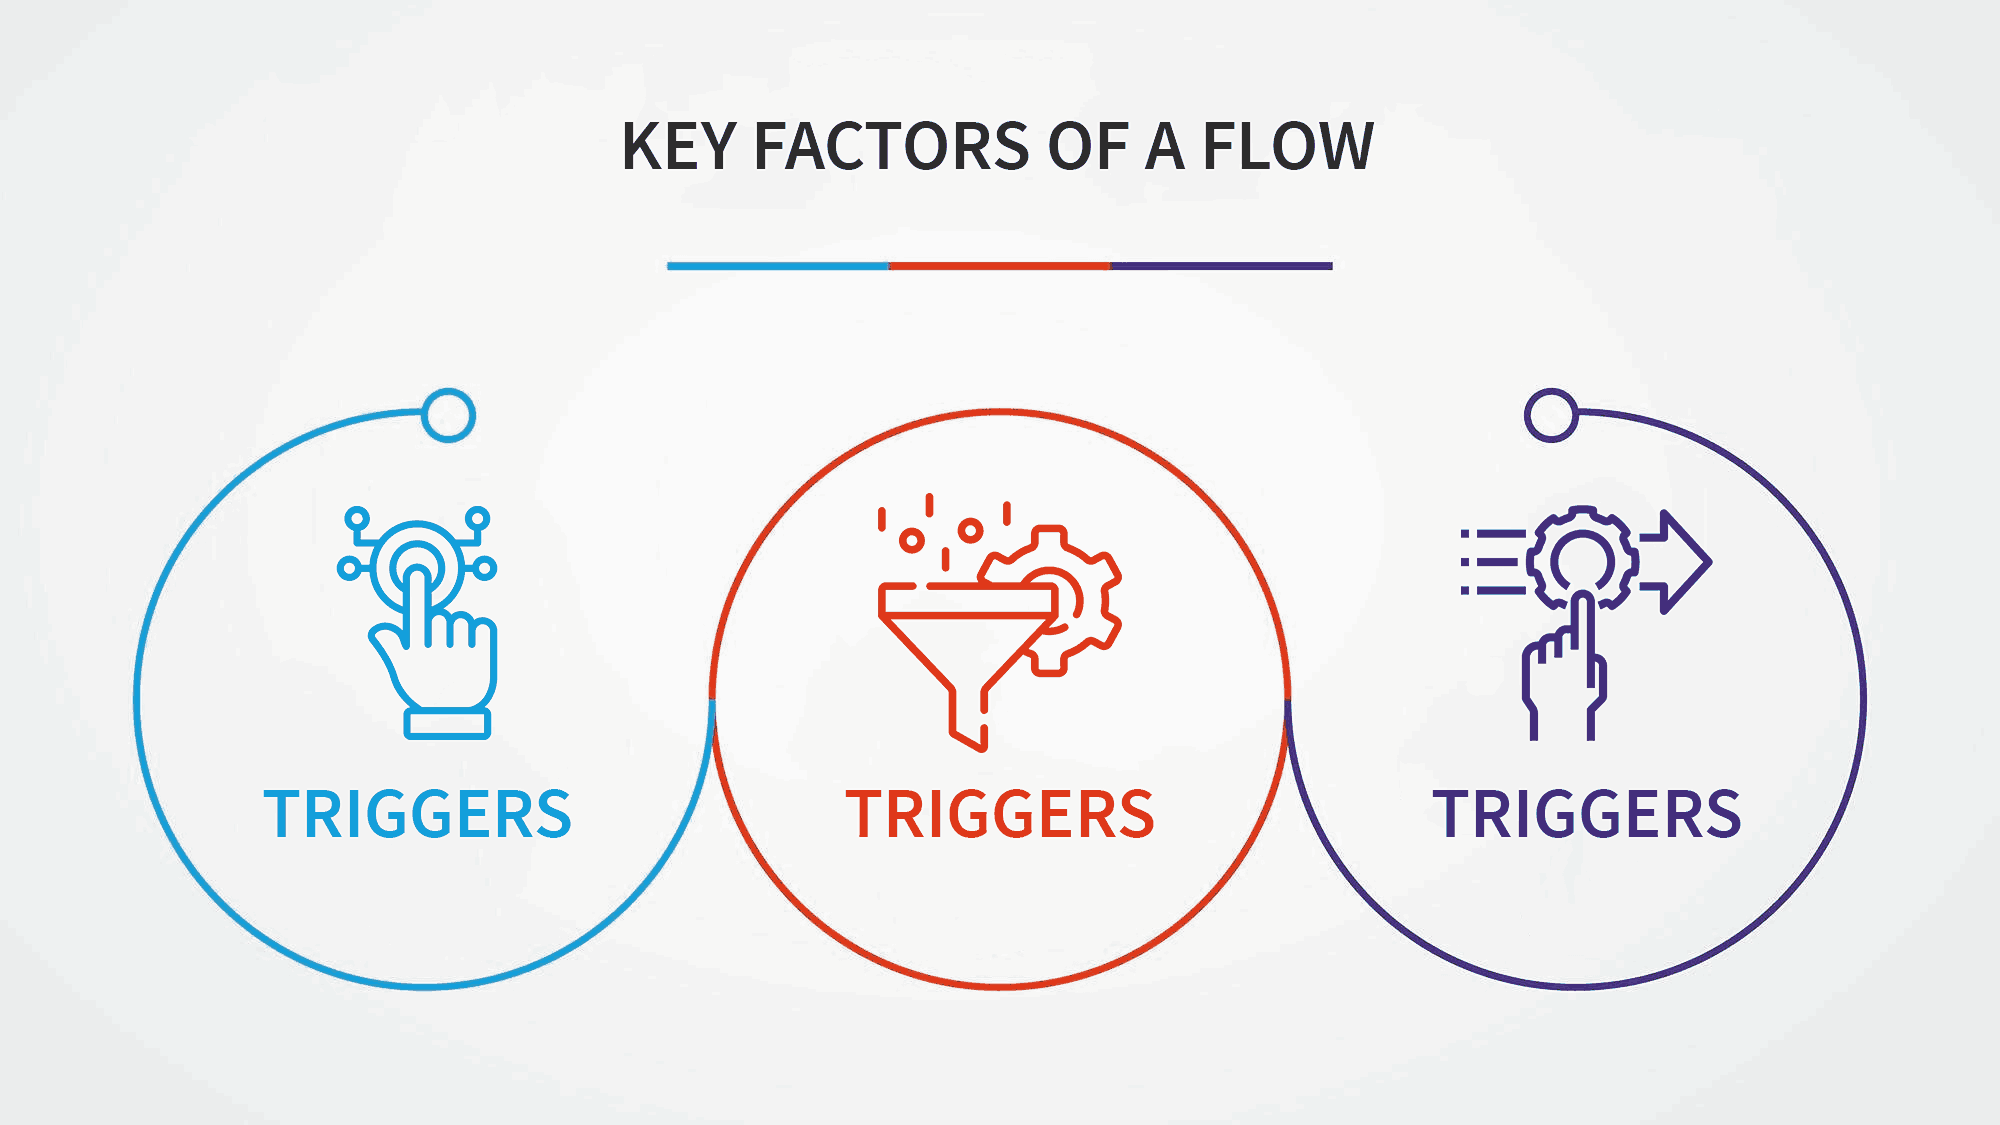
Any chatbot flow is based on three key factors - Triggers, Actions and Filters. Understanding these factors may come in handy while designing the chatbot flow.
1. Triggers
- What it is: A trigger is the event or condition that starts a specific part of the chatbot flow. It could be a user message, a button click, a time-based event, or any other interaction that initiates a response from the bot.
- Example: If a user types "Hello," the trigger is the word "Hello," which prompts the chatbot to respond with a greeting.
2. Filters
- What it is: Filters are conditions or rules that refine how the chatbot responds to triggers. They help the bot decide whether or not to execute a certain action based on specific criteria, such as user data, time of day, or previous interactions.
- Example: If the user has already interacted with the bot today, a filter might prevent the bot from sending the same greeting again and instead offer a different message like "Welcome back! What would you like to do next?"
3. Actions
- What it is: Actions are the tasks or responses that the chatbot performs after a trigger occurs. This could include sending a message, displaying options, performing calculations, or even redirecting the user to another part of the flow.
- Example: After detecting the trigger "Hello," the action could be the chatbot replying with "Hi there! How can I help you today?"
Putting it all together
- Trigger: A user asks about store hours.
- Filter: The chatbot checks if it's currently outside of store hours.
- Action: If it’s during store hours, the bot provides the current hours. If not, the bot might say, "Our store is currently closed, but we're open from 9 AM to 6 PM tomorrow."
These factors help create a logical and user-friendly chatbot experience, ensuring that the bot responds appropriately and efficiently to different scenarios.
Things to do before designing your chatbot flows
Determine what you intend your chatbot to do. I’m not saying that your bot has to have only one goal. It can have multiple objectives, but you need to outline them clearly. This is the foundation upon which you will build all your chatbot flows.
Do you need a conversational UI to drive sales? Maybe you need it to schedule appointments. Perhaps you want to use these virtual assistants for 24/7 customer service.
Whatever your goals are, you need to define them clearly.
For example: upGrad, a leading player in the Ed-tech space. It uses us (Engati) as their chatbot partners and this is what the goal of their chatbot is:
- Lead generation
- Provide sales support to website visitors who are in critical consideration stage
- Intelligent responses
- An assistant to answer inquiries, personalize responses, and
- nudge visitors toward enrollment.
You see, how the picture has become more clear now. Once the purpose is clear you can think of all the possible scenarios that might occur which can be used to create a seamless chatbot flow.
In order to humanize your chatbot you will have to have a personality of your chatbot. Imagine a person representing your company, how would it be? (It’s recommended to keep your chatbot persona as your brand persona).
Give your chatbot a name, and give it some traits. It can be formal, casual, witty, etc. It will help your bot to connect with your audience effectively and make the interaction more engaging.
You don’t want to leave your customers talking to a dull bot. You need to give your bot a personality, preferably one that matches your brand. Give your bot a persona and a story.
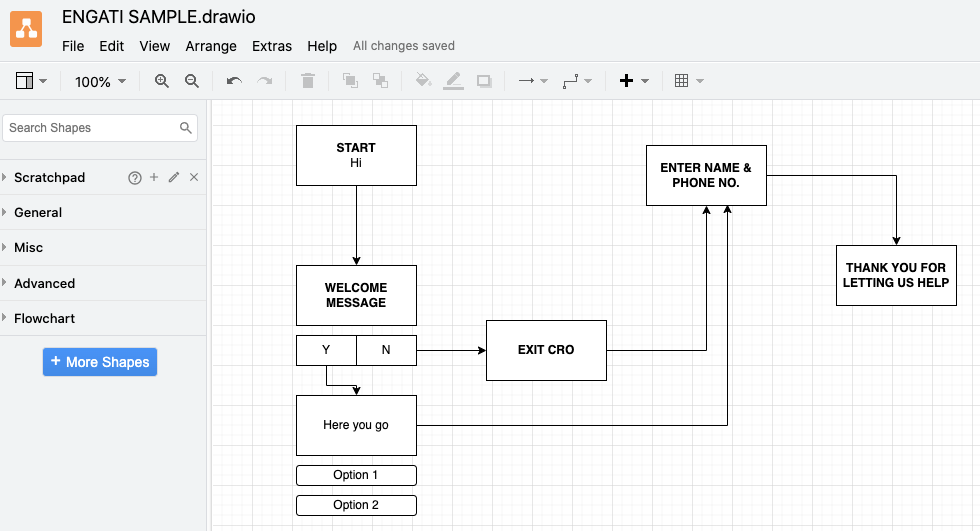
Once you have decided the purpose and personality of your bot, now it's time to create a roadmap of how the conversation would look like. Create a chatbot flow diagram mapping out how the conversation will flow. You can use pen and paper to make a rough diagram. You don’t need to fill in the actual responses just yet. Just keep the general purpose of the message in mind.
_11zon.png)
After the rough diagram, you can further refine it on draw.io for better understanding and clarity.
Write down all the scenarios that might come up when someone interacts with your chatbot. Also keep in mind the purpose of the bot and then think. Put yourself in your customer’s shoes and think of all the scenarios that might occur, what would they ask, how would they reach a certain message, what would you do if they select a certain option, what your bot should do if it is unable to answer, etc. etc…
Keep in mind these key elements of a conversation:
- Greeting: This is how your chatbot says hello and starts the conversation. It sets the tone and makes the user feel welcomed.
Example: "Hi there! Welcome to our store. How can I assist you today?"
- Asking: When your chatbot needs more information, it asks the user questions to guide the conversation.
Example: "Could you please tell me your order number so I can check the status?"
- Informing: The bot provides the user with the information they need, like answering a question or giving details.
Example: "Your package is on its way and should arrive by Friday."
- Checking: The bot confirms if the user understood or if everything is correct, ensuring the conversation is on track.
Example: "Is that the correct address for delivery?"
- Fallback: If something goes wrong or the bot doesn't understand, it gently lets the user know and tries to fix the issue.
Example: "I’m sorry, I didn’t catch that. Could you please try rephrasing your question?"
- Apologizing: When the bot makes a mistake or can't help, it offers a quick apology to keep the conversation friendly.
Example: "Sorry about that! It seems I can’t help with that request, let me connect you with our agent."
- Suggesting: The bot offers options or ideas to help the user make a decision or find what they need.
Example: "Would you like to see our latest products or speak with a customer service representative?"
- Conclusion: The bot wraps up the conversation politely, making sure the user’s needs are met before saying goodbye.
Example: "Thanks for chatting with us! If you need anything else, feel free to reach out. Have a great day!"
Once this is done, you can replicate this on Engati’s no-code visual flow builder.
Engati is a conversation automation platform. We provide one of the best no-code enterprise grade integrated chatbot and live chat platforms.

How do you make a chatbot flow?
Prerequisites
Understanding the interface
Engati has some pre-made chatbot flows for different industries. You can either use them with small tweeks or create an entirely new flow from scratch.
With Engati, making a chatbot flow is super easy. All you have to do is drag and drop.
There are two main things to know while creating a chatbot flow -
- Steps
- Paths
Paths consist of all the steps a chatbot will follow in a certain scenario. whereas , steps a
Steps are the actions a chatbot will take in a particular scenario. All this step for one scenario is called path.
Lets understand this with a simple example.
Scenario 1: A user is on your chatbot for the first time.
These are the steps that might be there -
- Chatbot greets the new users: “Welcome new user”
- Give some information about your company: “We are a leading chatbot solution”
- Ask a question - “How can I help you?”
- Respond accordingly.
Scenario 2: A user returns to your chatbot.
These will be the steps:
- “Hey {name}, welcome back!
- “Hope you are satisfied with your last purchase, let us know what can I do for you today?”
- Respond accordingly.
Here the two scenarios are basically two different paths. Scenario 1 is a path which we can give a name as - ‘New user’ and scenario 2 can be named as - ‘Return user’.
Combination of these steps and paths to make the user journey seamless is called the chatbot flow. While you could build your entire chatbot flow in a single path, that isn’t the best idea. Creating separate paths for different scenarios will make it easier for you to understand your flow and edit it in the future. These paths can be connected using the Trigger Path node.
Before diving into how to create a chatbot flow, let’s get familiar with the interface and features that Engati has to offer.
1. This is the Path catalog.
All the different paths you create can be seen here.

2. This is the tool bar
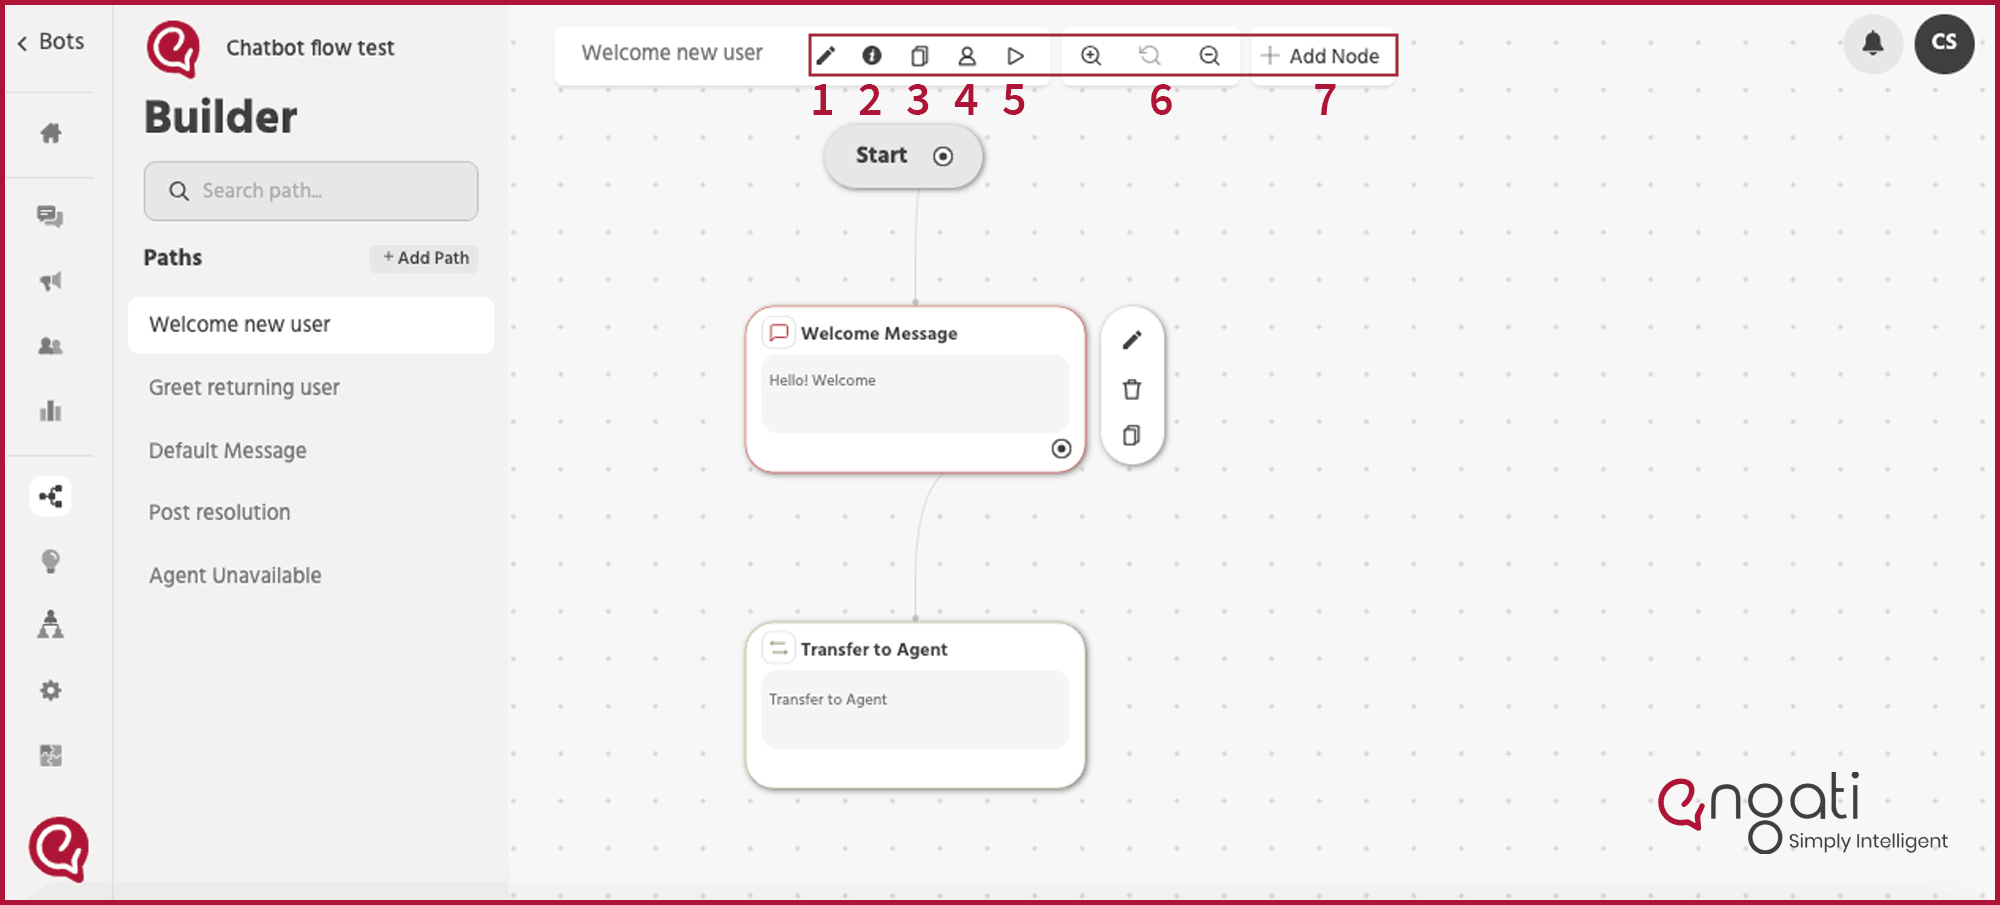
- Update path: You can use this to rename your path.
- Path info: This is where you can see the path path info. A unique path id.
- Copy path: You can use this option to make an exact duplicate of the path.
- Mark path as available for agent: This is to make the path available for your agent. For example, let's say you have created a path which takes a user to complete the payment. Your agent is talking to a user clearing their doubts about the product and now the user wants to make a purchase. If you give the access of this path to your agent, they can simply enable that path from their end, and the user can seamlessly continue in the same chat to finish their transaction without having the agent available for that time and meanwhile the agent can attend to other users who require assistance.
- Test path: This is to test if your path is working properly and to see how it works.
- Zoom in, reset, zoom out: This is to adjust the zooming of the flow builder screen.
- Nodes: Nodes are the key points in a chatbot conversation where something happens, like showing a message, asking a question, or making a decision. They guide the chat and connect different parts of the conversation. Think of them as the steps that move the chat forward.
What nodes can you use in your chatbot flow?

With Engati, there are a lot of nodes you can choose from. This makes it very flexible to build any kind of chatbot flow that you want no matter how complex it is. These nodes can be segmented into four categories:
- Display Information Nodes
- Data Input Nodes
- Processing Nodes
- Integration Nodes
And these are all the nodes that are available in Engati:
.gif)
1. Display Information Nodes
These nodes are used to present information to the end-user.
- Send Message Node: This node is used to send basic text and emoji messages to your users.
- Send Message With Options Node: Use this node to send a message with predefined options for your bot users to choose from.
- Send Image, Video, and Audio Nodes: These nodes allow you to make your bots more interactive by sending images, videos, and audio files.
- Send Document Node: With this node you can share documents like PDFs or Excel sheets if you want to.
- Send Carousel Node: This node helps you send interactive messages with images, text, subtext, links, and buttons. It is primarily used to display offerings.
- Randomize Messages Node: Use this node to send messages from a particular set at random.
2. Data Input Nodes
You can use these nodes to collect information from end-users.
- Feedback Node: This node allows users to provide feedback in the form of ratings.
- Identity Node: Use this node to collect user input in an input form and add an authentication validation
- Request User Data Node: It enables the chatbot to read inputs and save them as attributes or entities. It is beneficial for generating leads and personalizing experiences.
- Slider Node: It allows the user to provide inputs visually using a slider.
- Form Node: This node gives you more control over the validations of each field. It’s critical for lead generation and data capture.
- File Upload Node: This allows your users to upload files to your bot. They do this either as a public upload, a private upload, or a direct upload.
3. Processing Nodes
These nodes help you handle & process information and make conversation flow branching decisions.
- Script Node: It allows you to insert custom Javascript code to get executed along with the path. This helps you build complex flows with logical operations, data processing/transformation, etc., without having a separate backend infrastructure.
- Filter FAQ Node: This allows users to limit the category/categories of FAQs addressed in a path.
- Send Email Node: You can configure an email node anywhere in the bot and send out notifications to your users.
- Pause Node: Use this to slow down the conversation, allowing the user to process the information you have sent.
- Send SMS Node: It allows you to send SMS notifications to your users.
- Trigger Live Chat: This node routes the conversation to one of your live agents.
- Trigger Path Node: Use this node to send your user down another path.
- Subscribe/Unsubscribe From Campaign Nodes: This allows your users to opt-in or opt-out of the marketing and promotional campaigns you’re running over your chatbot.
- Decision Node: With this node, you can direct the chatbot flow based on the user and the bot’s interaction.
- Webview Node: This is used for use-cases that involve a third-party web interface. It has inbuilt parameters for Stripe and Google OAuth.
4. Integration Nodes
These nodes allow you to extend your marketing and support systems by integrating them with Engati.
- Salesforce: Integrate Salesforce with Engati to make it easier for your bot and your agents to handle tickets.
- Zendesk: Use Engati with Zendesk to create tickets, retrieve ticket details, and update them directly over your bot.
- Freshdesk: Like Zendesk, integrate Freshdesk to create tickets, retrieve details, and update them from your chatbot.
- Google Sheets: This node allows your bot to pull data from the sheets, add new data, and modify existing data.
- Google Calendar: It allows your bot to schedule appointments, demo calls, time slots for activities, and team meetings.
- Zapier Integrations: You can use Zapier to integrate Engati with any of the cloud services they support.
- JSON API: Engati allows you to use JSON REST APIs with the GET, POST, and PUT methods.
Understanding the process of building a chatbot flow
Now that you are familiar with the interface and all the features, let's get started with real work.
Let’s create steps of conversation flow for your chatbot. For this sample flow we will use the diagram that we created before.
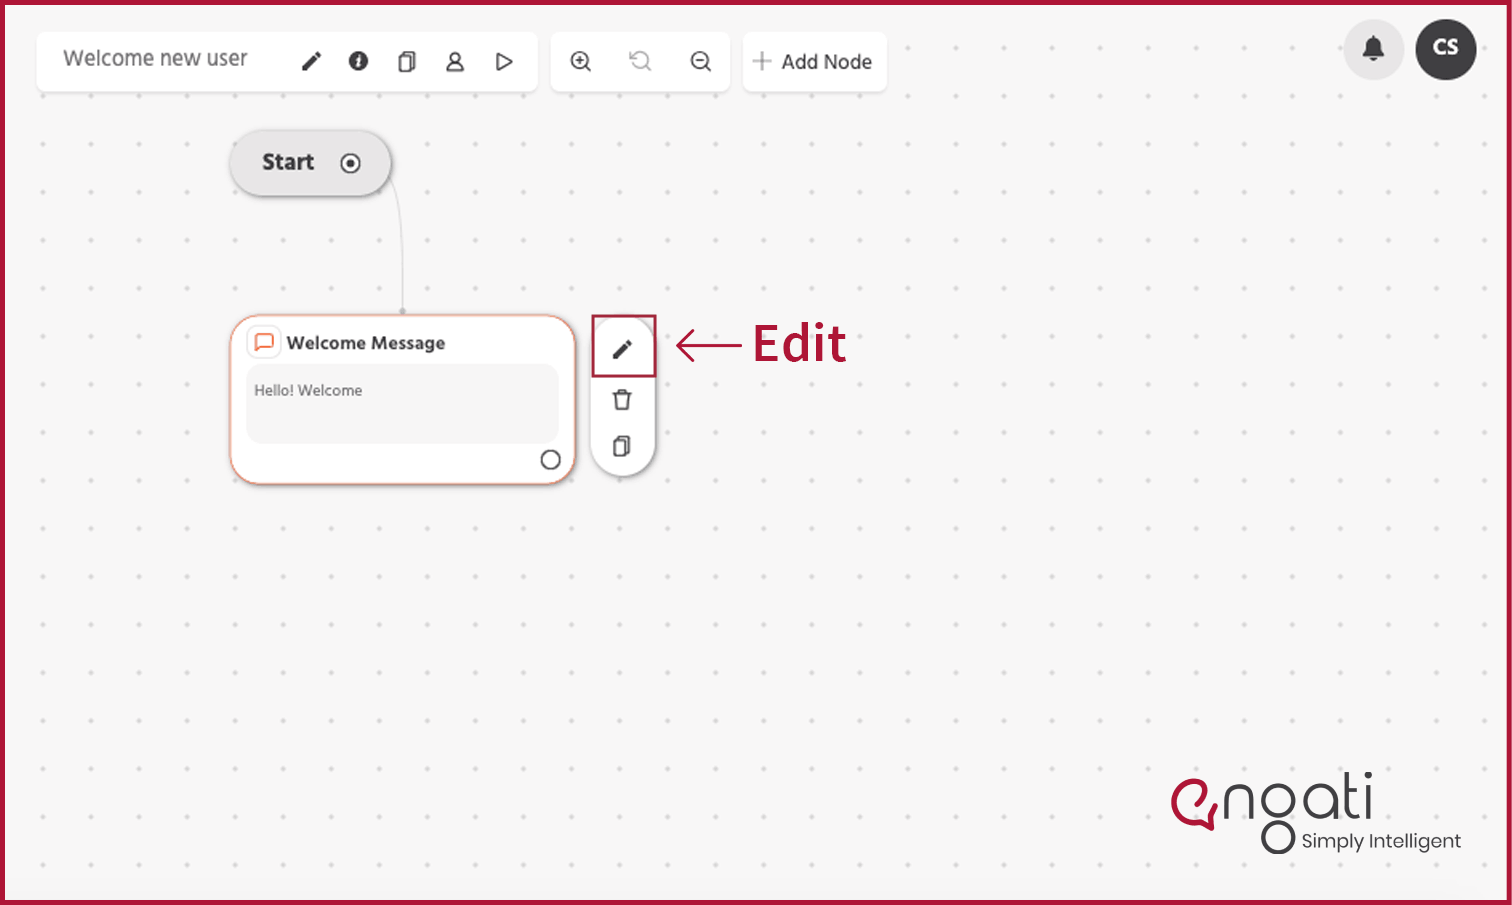
Step 1: Initial action is already created for you. You can edit the message by clicking on the edit button on the side.
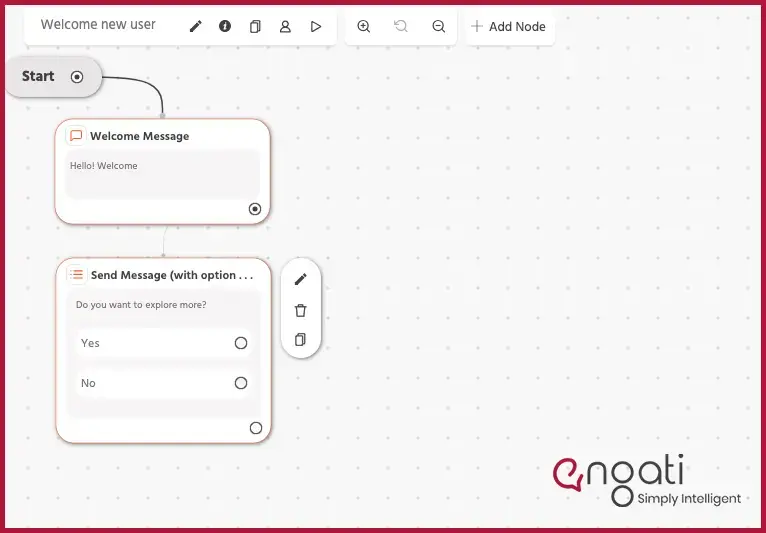
Step 2: Adding a ‘Display node’ that allows you to send messages with options.
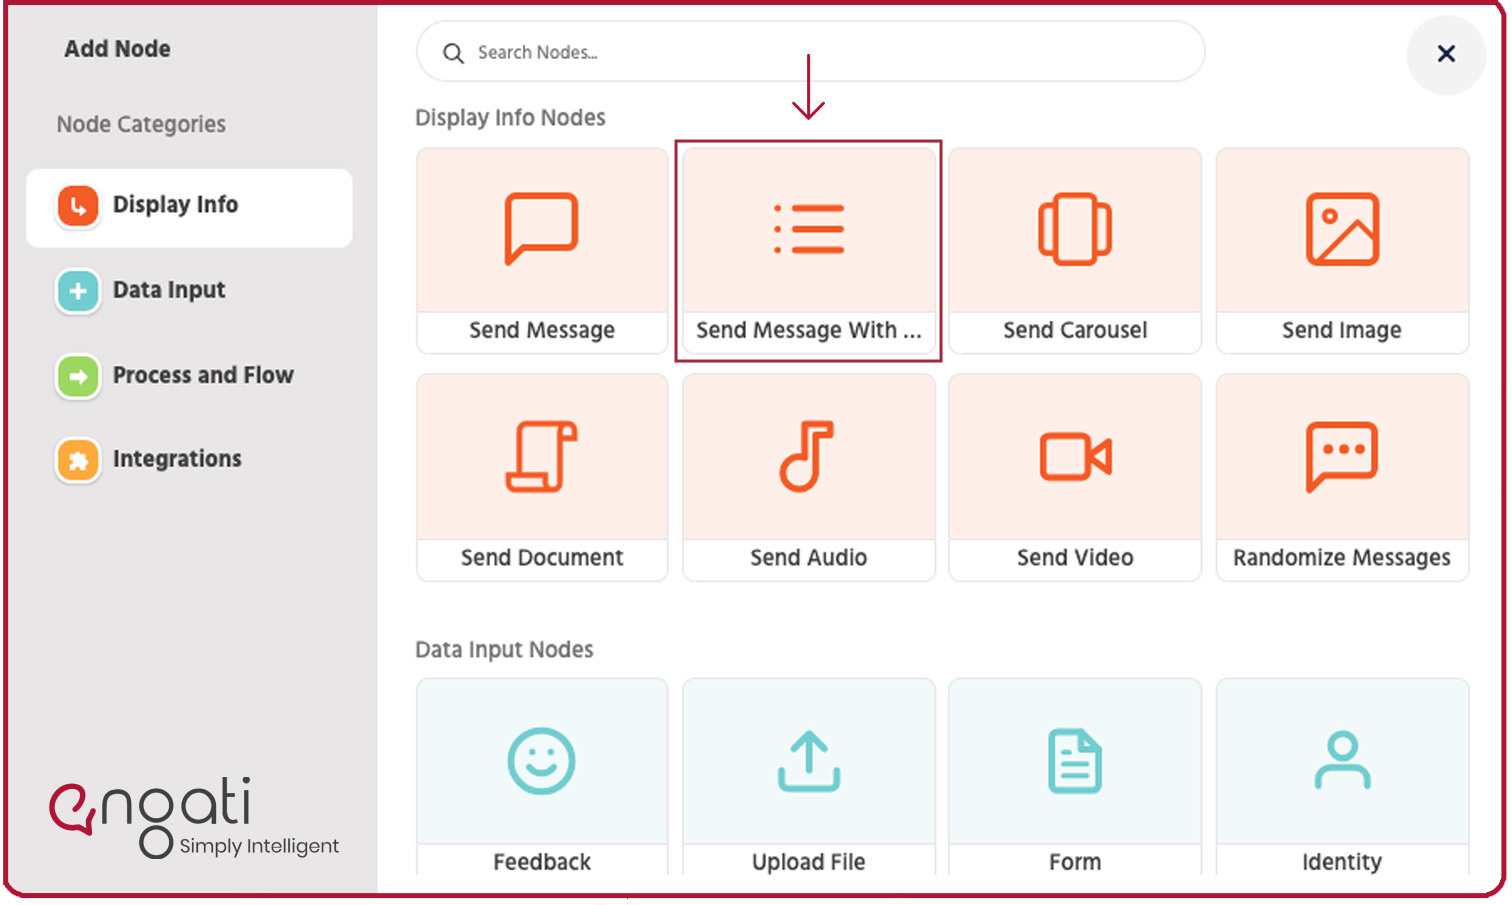
It will look something like this:
Step 3: Add a ‘Steps’ for someone who selects ‘Yes’.
- For this add another display node with options > Data input node with form > a simple text node with thank you message.
- Drag and drop the nodes to place them on the screen wherever you want them.
- Click and pull the string to attach each node with one another.
Your flow would look like this:
_1_11zon.png)
Step 4: Add ‘Steps’ for someone who selects ‘No’
- Add a display node with simple text with Exit Intend CRO > Further attach it with the form that you have already created to take your user to fill the form after which with thank you message will automatically get triggered.
Your flow would look something like this:
_2_11zon.png)
Once you’re done making your flow, proceed to polish the messages in the nodes. Make sure that they match your bot’s personality.
Now, it’s time for you to test your flow. You can test individual paths by pressing the play button on the top left corner of your path builder.
If you still have some queries and want our experts to walk you through the process tailored just for your business, we will be more than happy to.

The last phase in building your chatbot flow
Well creating the flow is not it. In order to make that flow work, you need to train your bot and fill it in with information about your company or store and the purpose of your chatbot. Building your chatbot flow is not a one-and-done task. You need to keep improving it as your customers, and your business evolve.
Lucky for you, with Engati you can train your chatbot in two different ways without puting in any manual or technical efforts.
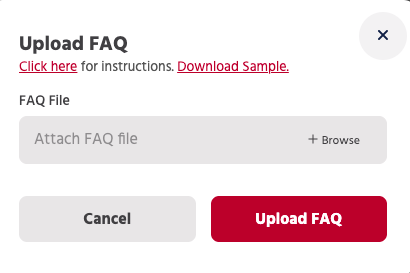
First, you can upload FAQs either individually or in bulk.

However, you don’t need to upload these FAQs manually. With Engati’s DocuSense technology, you can automate the training process. All you need to do is upload your documents. Your chatbot will use cognitive search to parse through your documents, 12 pages every 8 seconds. It will pull answers directly from your documents and deliver them to your customers.
And the best part? You don’t even need to format your documents into questions and answers.

Now that you know how to build a chatbot flow, it’s time to address another question.
How do you end a chatbot flow?
Too many companies allow their chatbot flows to end abruptly after a user’s questions are answered. That’s far from ideal.
It feels unnatural. Worse, it looks as though you though care enough about your customers.
Make sure to conclude the conversation by thanking your users for giving you the opportunity to help them. And don’t forget to let them know that you’re always there for them, just one message away.
What are the best practices for building chatbot flows?
.webp)
Do not mislead users into thinking that they’re chatting with a human. Let them know that they’re conversing with an intelligent bot, and if need be, you can route them to a live agent.
You wouldn’t want to read a message that looks like a massive chunk of text. Don’t force your customers to do that either.
Don’t send too many messages in rapid succession. Give your customers a chance to read them and respond.
Ask your customers how they felt about their interaction with your bot. You can use the feedback node to collect ratings. You can even ask them for subjective feedback. This will not only help you improve your chatbot conversation flow, but it will also make your customers feel like you care about them.
Don’t assume that your customers just want to talk business and keep it to the point. Your bot should be able to respond to questions like “How are you doing?” or “Good morning.”
All you have to do is go to the Conversations section in the Configure tab and enable small talk.

There you have it. Everything you need to build chatbot flows that your customers will love. Now it’s time to give it a shot yourself. Try Engati’s visual chatbot flow builder today! Click here to Sign-Up for free.


