What are GIT branching strategies?
GIT branching strategies are patterns or approaches that you can use to organize & manage your code through different branches in a GIT system. Each strategy defines the rules & guidelines for the creation, naming & merging the branches for facilitating collaboration, stability, & release management.
In this article, we're going to discuss git branching strategy best use cases, hands-on on git, as well as the git branching strategies we follow. Along with recommendations on how to use git to accomplish work in a consistent and productive manner.

Important GIT commands
Git commands are used to give specific instructions to the Git version control system to perform a particular operation. Git commands are used to manage any changes that may occur in source code repositories, track revisions, and collaborate with other developers. Here are some important Git commands you might want to keep handy.
1. To create a copy of a git repository from the remote source to your local, also set the remote to the original source so that you can pull/push on the same repository.
git clone <remote origin="" url=""></remote>
2. Command for how to change branch name in Git.
Git branch -m <old_branch_name> <new_branch_name>
3. To create a new branch from an existing branch with preserve the uncommitted/stash changes.
git checkout -b <branch_name></branch_name>
4. To check all the branch's revisions in your local system also helps in finding out which branch is currently active.
git branch
5. To add content from the working directory into the staging area (or “index”) for the next, commit.
git add -p
6. Create a new commit containing the current contents of the index and the given log message describing the changes
git commit -m <commit message=""></commit>
7. To publish locally committed changes to origin.
git push origin <branch name=""></branch>
8. To fetch & merge changes from origin to your local branch.
git pull origin <branch name=""></branch>
9. To record the current state of the working directory and the index, but want to go back to a clean working directory.
git stash
10. To list all the recorded indexes of the working directory/repository.
git stash list
11. To list all the recorded indexes of the working directory/repository and leave it in the stash stack.
git stash pop
12. To apply the top stashed element to your current working branch/directory and remove it from the stack
git stash apply
13. To view commit history with SHA for current active branch
git log
14. To reset the active branch head to a particular commit or branch.
git reset — hard <commit sha="" branch="" name=""></commit>
How to Create a Branch in GitHub
Creating a Branch in GitHub
You can create a branch in GitHub using its web interface. Here’s how:
- Navigate to your repository on GitHub.
- Click on the "Branch: main" dropdown button.
- Enter a new branch name into the text field.
- Click "Create branch" from the dropdown.
This will create a new branch from the currently active branch.
How to Create a Feature Branch in Git
Feature branches are used to develop new features or make changes. To create a feature branch in Git, follow these steps:
1. Create the Branch
git checkout -b <feature_branch_name>
2. Best Practices for Naming
- Use descriptive names related to the feature or task, such as `feature/user-authentication.`
- Avoid using spaces or special characters.
How to List All Branches in Git
Listing Branches
To see all branches in your repository, you need to lest all branches in Git. Use the following commands:
1. List Local Branches
git branch
2. List All Branches (Local and Remote)
git branch -a
Understanding Feature Branches
Feature branches are used to develop and test new features independently from the main codebase. Each feature branch is created from the main branch and merged back once the feature is complete. This practice helps isolate changes and allows for better testing and review processes.
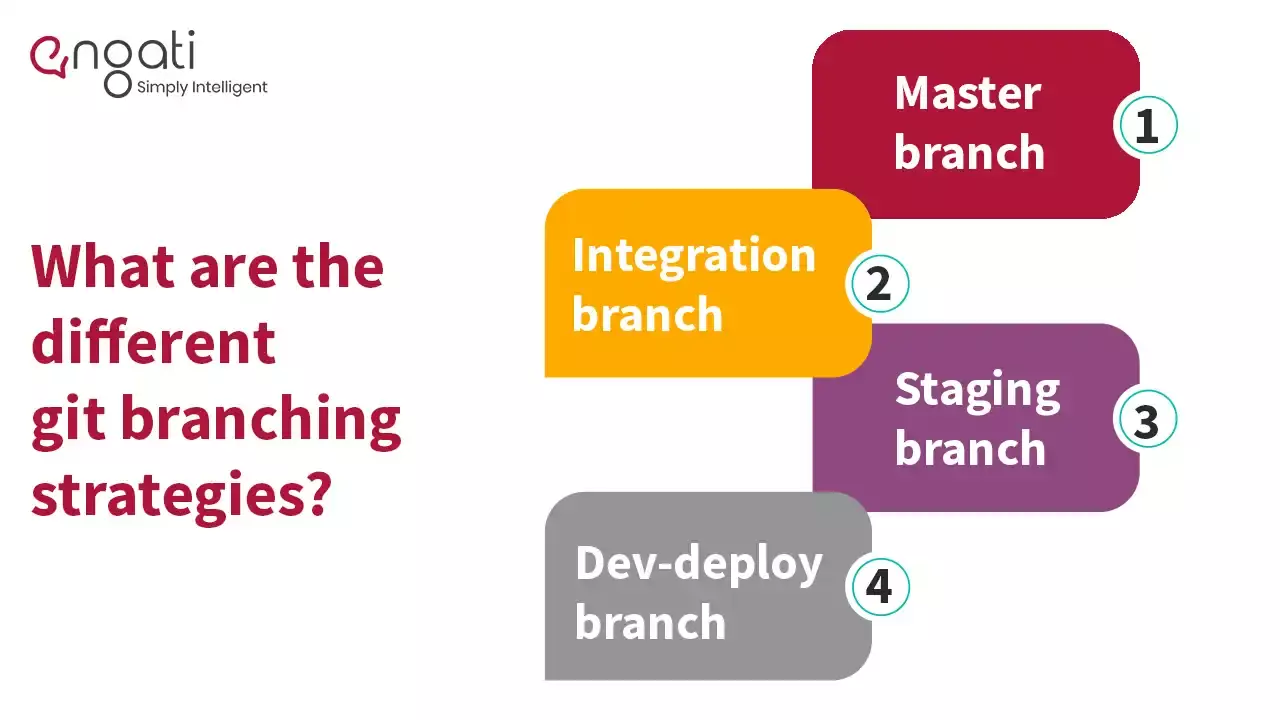
What are the different GIT branching strategies?
It is crucial to learn GIT branching strategies for anyone who uses GIT. Here are some commonly used git branching strategies:

Master branch
This is the main branch and one of the repositories in which we have the latest stable code of production.
General rules:
- Access to direct merge is restricted.
- Best practice is to create a CI/CD pipeline to merge code into this branch after deployment is done in Production.
- It should always have the latest stable version of the production server.
- Allow access to only CD tools like Jenkins to make commits to this branch.
The master branch should never have unreleased code, i.e., commits made but not yet released.
Integration branch
This is the most important and active branch of the repository from which we make releases to the production server.
General rules:
- Access to direct merge is restricted.
- Code is merged into this branch when it becomes eligible for production deployment.
- Code in this branch should always be in a deployable state to production.
- QA tested code should be into this branch using CI/CD tools.
Ideally, the Integration branch should also never have unreleased code, some time on the deployment day when the code is merged a few hours before deployment time.
Staging branch
This is another stable branch of the repository for QA-environment from which we make releases to the QA server.
General rules:
- Access is restricted.
- Changes can be submitted only through Pull Requests. No direct commits are allowed.
- Should always have the latest stable/released version of QA release server.
- It is absolutely necessary to ensure only dev tested and reviewed code gets merged into this branch.
Prior to production deployment, all the feature changes must get merged in staging and validated on QA. Once validation is completed, we'll raise another MR towards the integration branch.
Dev-deploy branch
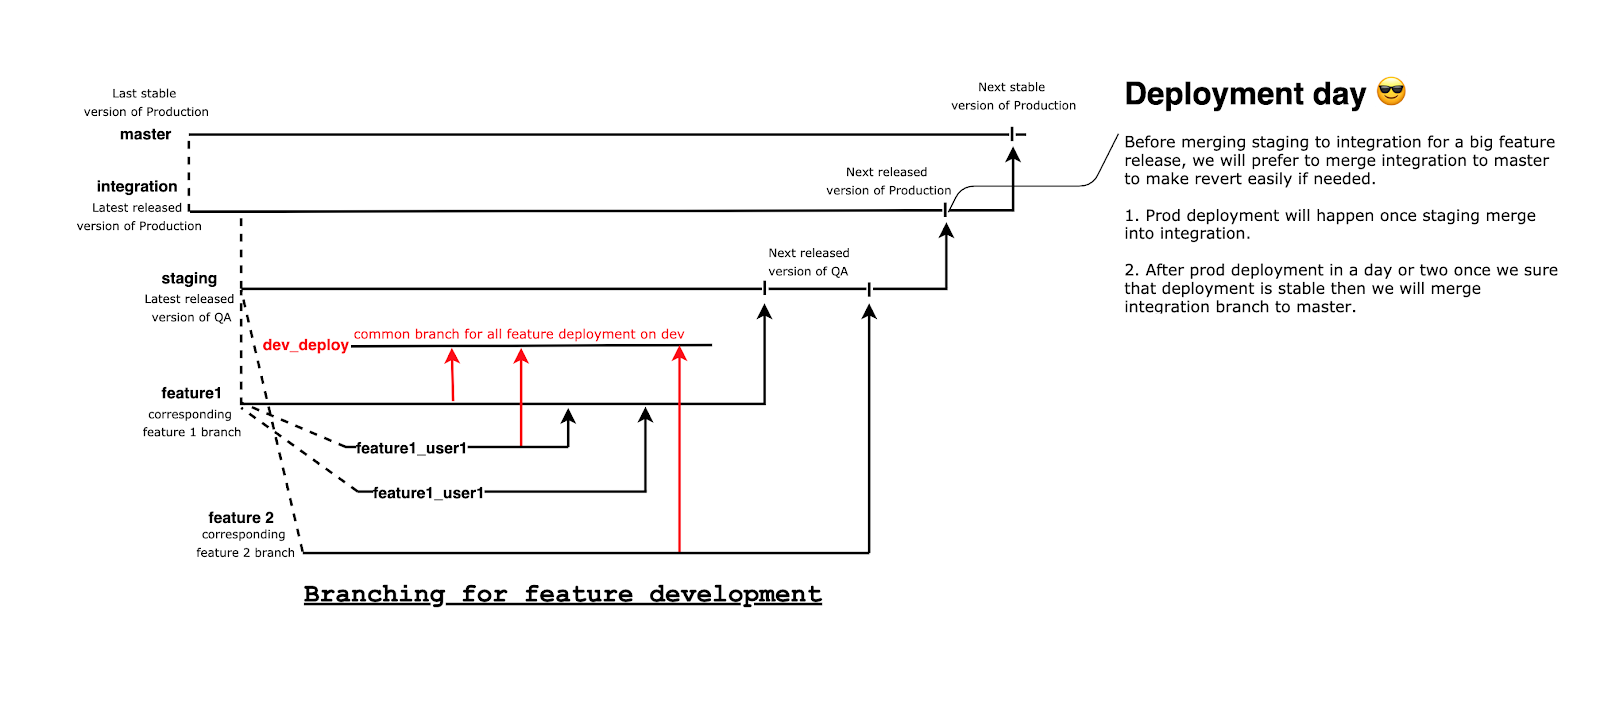
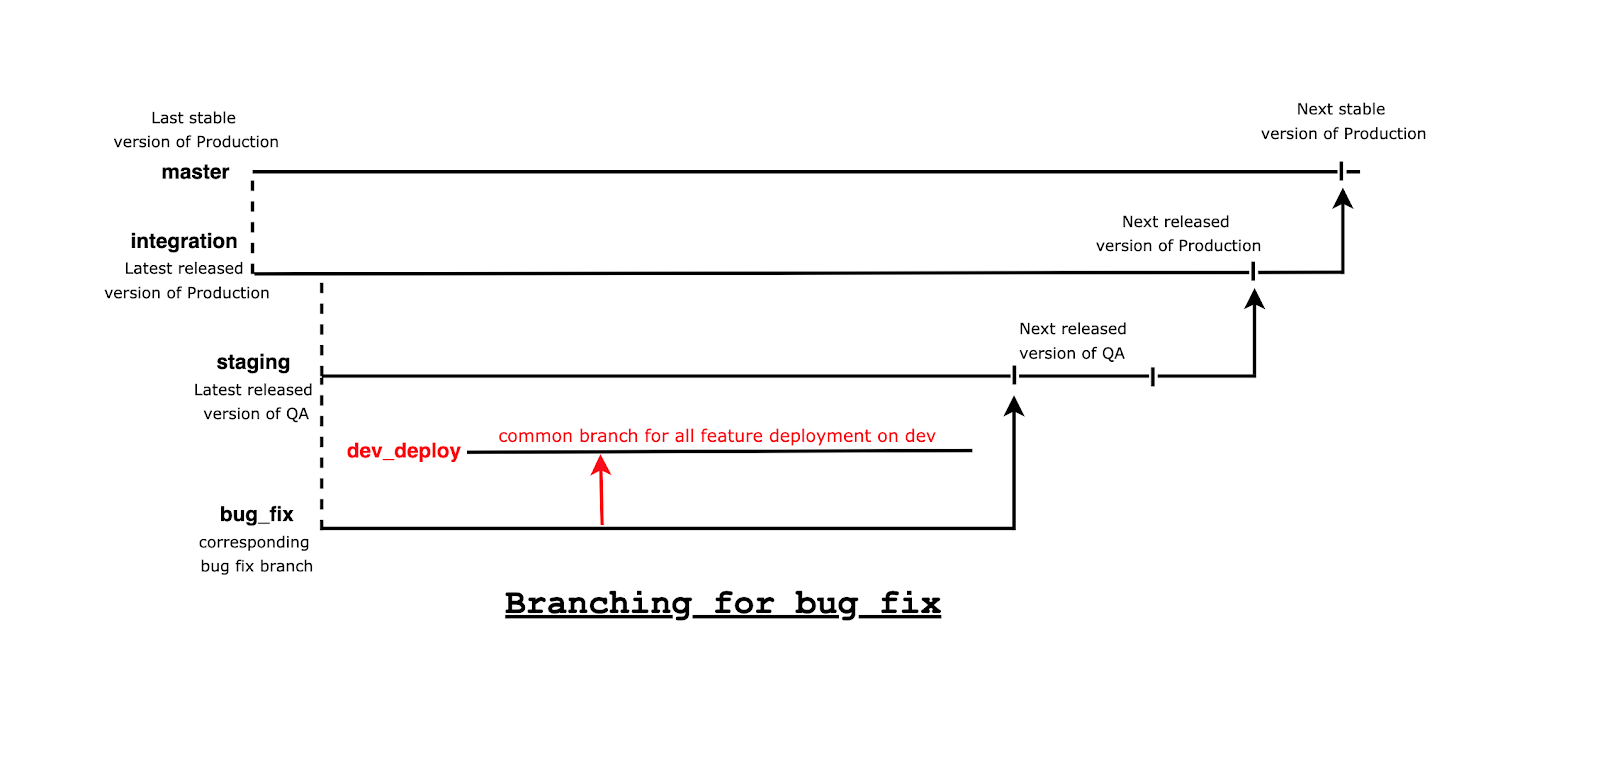
This branch will be used primarily for deploying on-going development work to the Dev environment. Since multiple teams may work on different features, projects and bugs at the same time, all of them need a Dev environment to test the changes before moving to QA. The idea of the Dev-deploy branch is to merge multiple feature branches to a common branch and deploy the same.
This is so that everyone can use a shared development environment at the same time to validate changes.
Feature deployment

Bugfix deployment

Centralized Workflow
- There's typically a single main branch in this strategy where developers commit directly.
- Generally used for small projects for a small set of contributors.
- Collaboration happens by committing changes directly to the main branch.
Feature Branch Workflow
- The developers create a separate branch for each feature that they're working on.
- Each feature branch is independent & can be developed and tested without disturbing the main branch.
- Collaboration occurs by merging feature branches into the main branch.
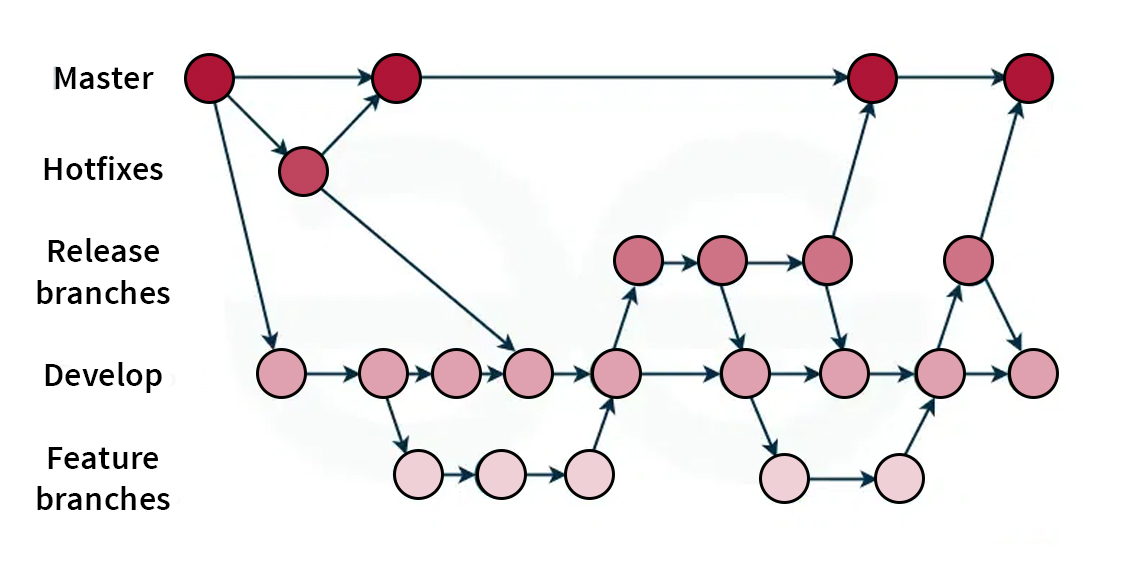
GitFlow
- It is a branching strategy in GIT that defines specific branches for various stages of development.
- It includes main branches for production-ready code, and other branches for on-going development.
- Feature, release and hotfix branches are used to facilitate collaboration.
Forking workflow
- This strategy is generally used in open-source projects.
- Each developer creates their own fork (copy) and they work on changes in separate branches.
- Collaboration happens through pull requests.
Trunk-based Development
- There's a single main branch representing the current state of application.
- Integration & deployment practices are continuous for ensuring stability.
Release Branching
- This involves creating a separate branch for preparing releases.
- Bug fixes & release-specific changes are implemented in the release branch while the main branch remains unaffected.
Do’s and Don’ts for your GIT branching strategy?
With so many GIT strategies, be careful with a couple of things:
Dos:
- Make sure to create a new branch for every new feature and bug from staging/integration.
- Frequently commit and push changes to the remote branch to avoid loss of work.
- Include a gitignore file in your project to avoid unwanted files getting committed.
- Ensure that you commit changes with a concise and useful commit message.
- Keep your branch up to date with development branches.
- Make sure to create a MR for merging changes from one branch to another one.
- Conduct a self-review of your code before you create a MR or send it for review to your colleagues.
Don’ts:
- Do not ever take pull in your feature branch from Dev deploy branch. People tend to do this while they are resolving conflicts from the Dev deploy branch.
- Never commit directly to the Dev deploy branch.
- Avoid holding up working by failing to commit local branch changes to remote branches. You could end up losing your work if your system crashes.
- Do not work on several features or issues in the same branch. It becomes hard if you need to drop one feature and deploy another feature at any point of time.
- Never reset a branch without committing or stashing your changes. If you do that, you will lose your changes.
- Try not to revert a MR which is already merged.
To sum it up
We hope this article will help you use git in a more productive manner and assists you with your branching strategy in GIT. Another tool that boosts productivity are chatbots. Get started with an Engati Chatbot today!


