What is a Skype bot?
A Skype chatbot is a tool that makes it possible for you or your business to automate conversations with users and customers on Skype. These Skype chatbots can be rather useful for your customers to get instant answers to all their questions, and it can also be used to automate the routine tasks that your employees would otherwise need to keep performing manually and monotonously on a repetitive basis.
Skype is an instant messaging app owned by Microsoft that has online text messages and video chat services. Skype’s text, voice, and video features make it simple to share experiences with the folks that want to keep in touch with you, wherever they are. You'll be able to use Skype on whatever works best for you – on your phone, or computer, or even a TV.
Towards the end of Q1 2016, Skype opened up it’s APIs. In spring 2016, Microsoft announced the launch of chatbots on Skype Messenger. At a conference in San Francisco, the Company introduced the Skype Bot platform with a ready-made set of tools for the creation of automated dialog systems for developers.
Skype bots are artificially intelligent programs that you simply can chat with on Skype’s platform. You can simply click on the bot and begin typing.
How do Skype bots work?
As a text-based chatbot, Skype chatbots respond to buttons and text input. But in addition to that, Skype also made it possible for you to build voice-based chatbots and deploy them on Skype. This makes it possible for you to make it much easier for users to interact with your Skype chatbot. Your users would not need to manually type in their questions or even click on buttons. All they would need to do is speak, and the Skype chatbot would be able to reply to them and answer their queries.
Some of the essential messaging functionalities available on a Skype chatbot include:
Buttons: These are used to prompt a user to select a request or a command from a list of ready ones instead of needing to frame and type one out themselves. This is rather effective at reducing customer effort levels.
Elements: These are messages with complete product cards that include a picture of the product, it’s name, and it’s price. Think of these as the carousel messages that you can send from an Engati chatbot.
Payments: Skype chatbots also enable users to make payments via invoices and support for several payment systems.
There is also a menu function. This is essentially a list of the bot’s features that pops up at the greeting. This shows the user that they are communicating wiht a Skype bot and sets expectations regarding what the bot can do for them. It is also possible to integrate your Skype chatbot with Google Analytics, and pull relevant data from there when prompted.
It was also possible to create and deploy a Skype for Business chatbot. But Microsoft has chosen to restrict the creation of new Skype for Business bots. Microsoft enforced these restrictions on June 30, 2019. Chatbots that were already deployed and existing on Skype for Business kept functioning and operating until October 31, 2019, and stopped working after that date. Right now Skype for Business, as a channel, is being deprecated.
There are three mechanisms users can find and add your bot:
- Users can add your Bot from a specific bot URL link. The link can be found on the dev portal for your Bot
- You can add Skype Bot button on your website which points to your Bots add URL https://www.skype.com/en/developer/create-addbot-button/
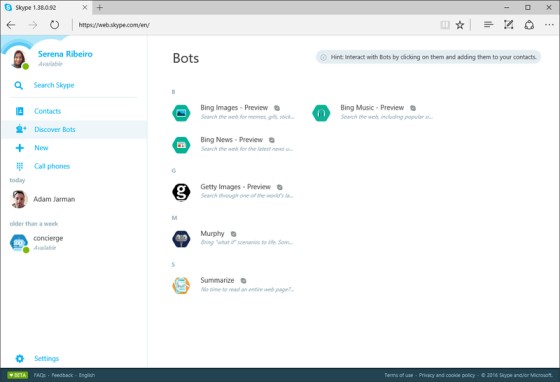
- Once your Bot is approved for publishing, users can find it in the Skype Bot Directory available in Skype clients

How do you make a Skype bot?
1. Create a bot on bot framework
If you have a Skype account then go to URL (https://dev.botframework.com/bots/new) and sign in. If you don’t have an account you will have to create a Microsoft account and then proceed further. Then, fill in the necessary details about your Bot in the Bot Framework:
- Name,
- Bot handle,
- Description
Finally, check the box Enable streaming endpoint.
2. Updating Messaging endpoint
Under the configuration section for the Message endpoint Field, paste the Endpoint URL fromEngati-Portal for the Endpoint Url go to Deploy->Skype
3. Creating App ID and App Secret
Under the configuration section, Click on “Create Microsoft App ID and password” button. Once you click on the button, you will have your App ID and App name. You will also see a button to “Generate an app password to continue.”
After clicking on that, a password is generated. Note down this App Password as shown in the below screenshot for future reference. Click on “Finish and go back to Bot Framework” button. And click on “Register” button and to officially create your bot.
Now, go back to Engati- Portal go to Deploy->Skype, fill in the App ID, App Secret details. Click on “Save” button.
4. Adding Skype as a channel on Bot framework
Go to your Microsoft Bot Framework URL (https://dev.botframework.com/bots) and select your bot. In your Bot Framework under “Add a featured channel” section, click on “Skype” icon. Now, click on “Save” button.
Next, click on “Channels” in the menu and you’ll be redirected to the following screen. Now click on “Skype” to add the bot into your contact.
5. Adding to your Skype contacts
Click on “Add to Contacts”, the Skype application will be launched. Now, send a message to the bot from your Skype contacts and test your bot there.


